Master Reverse Sear Technique for Perfect Grilled Steaks
Master Reverse Sear Technique for Perfect Grilled Steaks

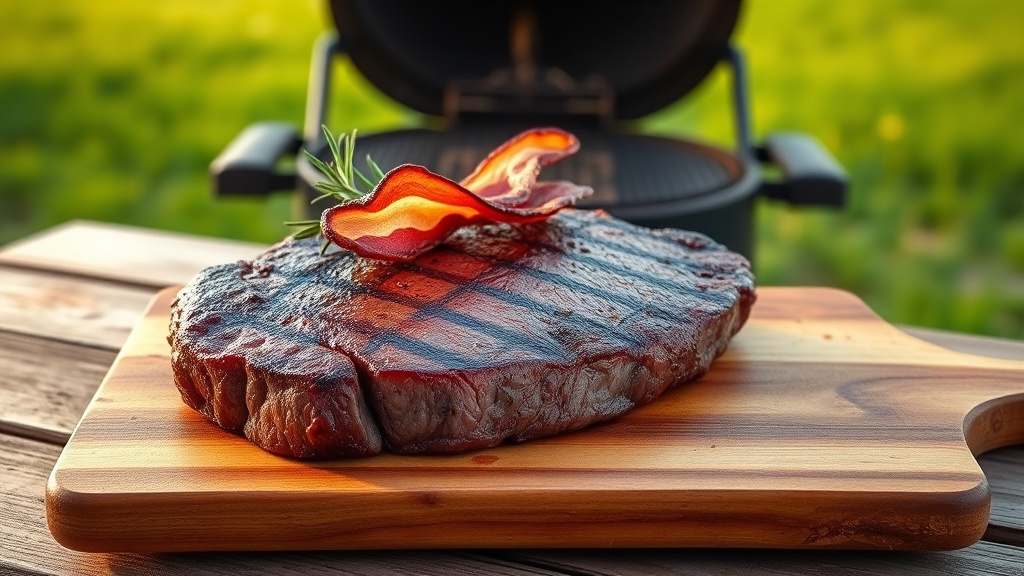
When it comes to grilling steaks, most people follow the traditional method: get the grill hot, sear the meat, and hope for the best. But what if there was a better way? The reverse sear technique has revolutionized how serious grillers cook steaks, delivering restaurant-quality results with minimal guesswork.
This advanced method involves cooking your steak slowly over indirect heat first, then finishing it with a quick, high-heat sear. The results? A perfectly cooked interior with a beautifully caramelized crust—every single time.
What Is the Reverse Sear Method?
The reverse sear flips the traditional cooking process on its head. Instead of starting with a high-heat sear that risks overcooking the interior, you begin with gentle, indirect heat cooking. Once the steak reaches your target internal temperature (usually 10°F below your final goal), you finish it with an intense sear on the grill grates.
This approach gives you greater control over the final doneness level while achieving that coveted crust without any gray, overcooked band beneath the surface.
Why Professional Chefs Love Reverse Searing
Chefs and experienced grillers prefer this technique for several compelling reasons:
Superior Temperature Control: Cooking low and slow gives you time to monitor internal temperature precisely. You can pull your steak at the exact moment it reaches your target, preventing overcooking.
Perfect Crust Development: The final sear happens on a dry surface at very high heat, creating maximum browning through the Maillard reaction—the chemical process that creates that delicious, complex flavor.
Reduced Carryover Cooking: By finishing with the sear rather than starting with it, you minimize the temperature increase after removing from heat, giving you more predictable final results.
Consistent Results: Whether you’re cooking a 1-inch sirloin or a 2-inch ribeye, the reverse sear method delivers consistency that traditional techniques struggle to match.
Equipment You’ll Need
Successfully executing the reverse sear requires just a few essential tools:
Meat Thermometer: Invest in a quality instant-read thermometer or a wireless probe thermometer. This is non-negotiable for reverse searing. Accuracy within a few degrees makes all the difference.
Two-Zone Grill Setup: Your grill should have the capability to create indirect (medium) and direct (high) heat zones. Gas grills excel at this, but charcoal can work with proper arrangement.
Tongs or Grill Spatula: Long-handled tools keep your hands safe during the high-heat finish.
Optional but Recommended: A grill thermometer to monitor grill temperature, and a resting tray to keep finished steaks warm.
The Complete Step-by-Step Process
Step 1: Prepare Your Steak
Remove your steak from the refrigerator 30-45 minutes before grilling. This allows it to come closer to room temperature, ensuring more even cooking. Pat it completely dry with paper towels—moisture interferes with browning.
Season generously with kosher salt and freshly ground black pepper just before placing it on the grill. Avoid seasoning too early, as salt draws moisture to the surface.
Step 2: Set Up Your Grill
For a gas grill: Light one side to medium heat (around 350°F) and leave the other side off.
For a charcoal grill: Arrange coals to one side, leaving the other side empty, or use a two-level setup with more coals on one side.
Allow your grill to stabilize at the target temperature before placing your steak.
Step 3: Cook Over Indirect Heat
Place the steak on the cooler side of the grill, away from direct heat. Close the grill lid to maintain steady temperature. You’re aiming to cook the steak until it reaches about 110-115°F internally for rare, 120-125°F for medium-rare, or 130-135°F for medium.
This phase typically takes 15-25 minutes depending on steak thickness and grill temperature. Don’t rush this—the slow cooking is what makes reverse searing special.
Avoid flipping constantly. Check the internal temperature every 5 minutes once you’re in the final stretch.
Step 4: Rest Before the Sear
Once your steak reaches the target temperature, remove it from the grill and let it rest on a clean plate for 3-5 minutes. Pat away any accumulated moisture with paper towels.
This brief rest allows the surface to dry further, essential for creating a proper crust.
Step 5: Perform the High-Heat Sear
While the steak rests, crank your grill to maximum heat. You want the grates screaming hot—aim for 500°F or higher if possible.
Place the steak directly over the heat source and sear for 60-90 seconds per side. You’re only looking for a quick, intense sear to develop color and crust. Your internal temperature will rise only 5-10°F during this phase.
Step 6: Final Rest and Serve
Transfer the steak to a cutting board and let it rest for 5 minutes. This crucial step allows juices to redistribute throughout the meat, keeping it moist when you cut into it.
Slice if desired, plate, and serve immediately with your favorite compound butter, sauce, or simply as-is.
Common Mistakes to Avoid
Skipping the Initial Drying: Moisture on the steak surface prevents proper browning. Always pat dry before both the indirect cooking and the sear.
Moving the Steak Too Often: Resist the urge to flip and fuss. Limit yourself to one flip during the indirect cooking phase.
Not Monitoring Temperature: Guessing at doneness defeats the entire purpose. Use a thermometer.
Insufficient Sear Heat: The final sear only works if your grill is genuinely hot. Take time to preheat properly.
Skipping the Rest Periods: These aren’t optional. Resting allows moisture to settle and temperature to equalize.
Steak Selection and Thickness
The reverse sear method works best with steaks at least 1.5 inches thick. Thinner cuts heat through too quickly during the indirect phase, reducing the technique’s benefits.
Ideal cuts include ribeye, New York strip, filet mignon, and porterhouse. Choose steaks with good marbling—the fat adds flavor and juiciness.
Temperature Guide for Doneness
Remember to remove steaks 10°F before your target final temperature, as carryover cooking will raise the internal temperature during resting:
- Rare: Remove at 120°F, finish at 130°F
- Medium-Rare: Remove at 125°F, finish at 135°F
- Medium: Remove at 135°F, finish at 145°F
Final Thoughts
The reverse sear technique might seem complicated at first, but it’s truly one of the most reliable methods for achieving perfect steaks on the grill. After your first successful attempt, you’ll wonder why you ever cooked steaks any other way.
The key is patience during the slow cooking phase and confidence during the high-heat finish. Master these fundamentals, and you’ll be impressing guests with restaurant-quality grilled steaks for years to come.