Master Reverse Sear Technique for Perfect Steaks Every Time
Master Reverse Sear Technique for Perfect Steaks Every Time

There’s nothing quite like a perfectly cooked steak fresh off the grill. However, achieving that ideal combination of a caramelized crust and a tender, pink interior can be challenging—until you master the reverse sear technique. This method has revolutionized how home cooks approach grilling premium cuts of beef, and once you understand the science behind it, you’ll never cook a thick steak the same way again.
What Is the Reverse Sear Method?
The reverse sear is a two-stage cooking process that flips the traditional approach on its head. Instead of searing your steak first over high heat and then moving it to lower heat to finish cooking, you’ll do the opposite: slowly cook your steak at low temperatures first, then finish with a quick, intense sear.
This technique offers superior results because it allows you to achieve precise doneness while the final sear creates the flavorful, textured crust that makes steak so satisfying. The method is particularly effective for thick-cut steaks (1.5 to 2+ inches), where traditional searing can leave the interior overcooked while waiting for the center to cook through.
Why Temperature Control Matters
Understanding your grill’s temperature zones is crucial for reverse searing success. You’ll need to create two distinct cooking environments:
The Low-Heat Zone
For the initial cooking phase, you want your grill temperature between 225°F and 275°F. This low, steady heat gently brings your steak up to the target internal temperature without overcooking the exterior. Use an instant-read meat thermometer—this tool is non-negotiable for consistent results.
The High-Heat Zone
For the final sear, you need intense heat between 450°F and 500°F. This rapid cooking creates the Maillard reaction, which develops those delicious, flavorful brown crusts without pushing the interior past your target doneness.
Step-by-Step Reverse Sear Process
Step 1: Prepare Your Steak
Remove your steak from the refrigerator 30-40 minutes before cooking. This allows it to reach closer to room temperature, ensuring more even cooking throughout. Pat the surface completely dry with paper towels—moisture is the enemy of browning. Season generously with salt and pepper just before cooking, or salt it 40+ minutes ahead to allow the salt to penetrate the meat.
Step 2: Set Up Your Grill
For gas grills, light one side to create your low-heat zone and keep the other side off. For charcoal grills, push your coals to one side, leaving the other side empty. Use your hand (carefully!) to test that your cooking grate is around 225-275°F.
Step 3: Monitor Internal Temperature
Place your steak on the cool side of the grill. Insert your meat thermometer into the thickest part of the steak, angling it parallel to the surface. Cook until the internal temperature reaches about 10°F below your target doneness:
- Rare: 120°F internal temperature
- Medium-rare: 130°F internal temperature (recommended)
- Medium: 140°F internal temperature
This typically takes 20-30 minutes depending on thickness and grill temperature. Avoid flipping frequently; let the steak cook undisturbed for better heat distribution.
Step 4: Rest Before Searing
Once your steak reaches the target temperature, transfer it to a plate and let it rest for 5-10 minutes. This brief rest allows the residual heat to distribute evenly and relaxes the muscle fibers.
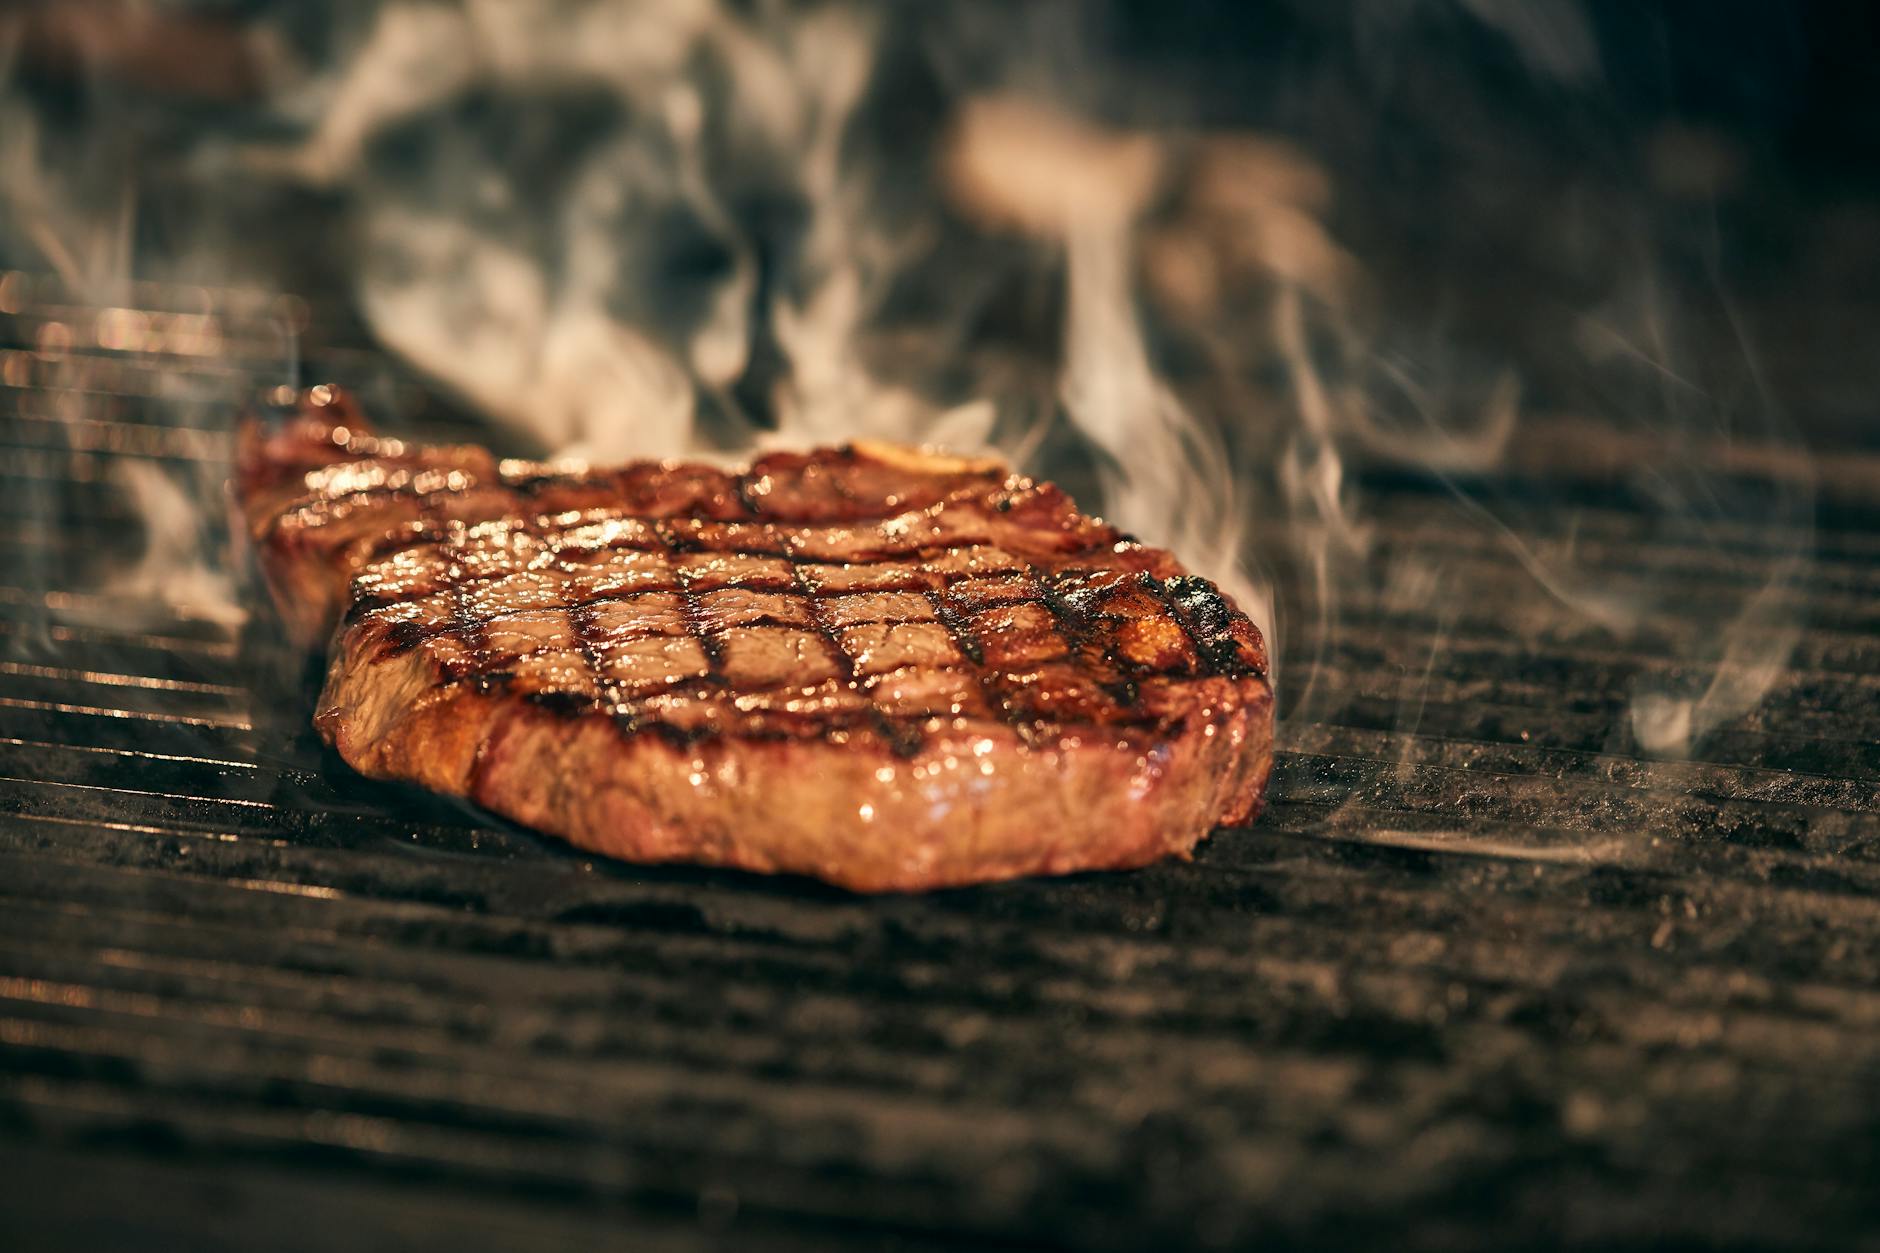
Step 5: The Final Sear
Increase your grill temperature to 450-500°F. Once it reaches temperature, sear your steak 1-2 minutes per side. You’re looking for a deep, golden-brown crust. Don’t move the steak around during searing—let it sit undisturbed for maximum browning.
Step 6: Rest and Serve
Remove your steak and let it rest for another 5 minutes. This final rest ensures the juices redistribute throughout the meat, resulting in a more succulent bite.
Pro Tips for Perfect Results
Invest in a quality meat thermometer. Digital instant-read thermometers are affordable and eliminate guesswork. Look for models with a quick response time (2-3 seconds) and a wide temperature range.
Don’t skip the resting periods. Resting allows carryover cooking to finish the job gently and helps retain moisture. This step makes a significant difference in final texture and juiciness.
Use the reverse sear for premium cuts. This method works best with high-quality steaks like ribeye, NY strip, or filet mignon. The expensive investment deserves this careful approach.
Consider butter and herbs during the final sear. Some pitmasters add a tablespoon of butter with fresh rosemary or thyme during the final minute of searing for extra flavor depth.
Understand your grill’s hot spots. Every grill has temperature variations. Spend time learning where the hottest and coolest areas are on your specific equipment.
Common Mistakes to Avoid
Cooking too hot initially. This defeats the purpose of reverse searing. Maintain steady low heat for the majority of cooking time.
Skipping the thermometer. Touch tests are unreliable. Always use a proper meat thermometer for consistency.
Overcrowding the grill. Each steak needs space around it for air circulation and proper heat distribution. Grill steaks one or two at a time if necessary.
Searing a wet steak. Moisture prevents browning. Ensure your steak surface is completely dry before the searing stage.
Conclusion
The reverse sear technique is a game-changer for anyone serious about outdoor cooking. By combining low-temperature cooking with a quick, intense sear, you’ll achieve restaurant-quality steaks with consistent, predictable results. The method requires patience and proper equipment—particularly a reliable meat thermometer—but the investment pays dividends every time you fire up your grill.
Start with this technique on your next special occasion, and you’ll understand why so many grilling enthusiasts have made it their standard approach to cooking premium steaks. Your friends and family will definitely notice the difference.